A Step-by-Step Guide to Implementing Google SSO

How to Create a Project on Google Cloud Console?
1 – Open the Google Cloud Console:
https://console.cloud.google.com/
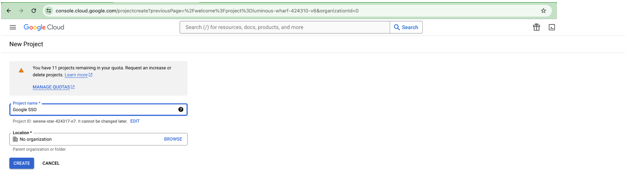
2 – Create Project
3 – Select the Project:
Here I am selecting the Google SSO project as shown below: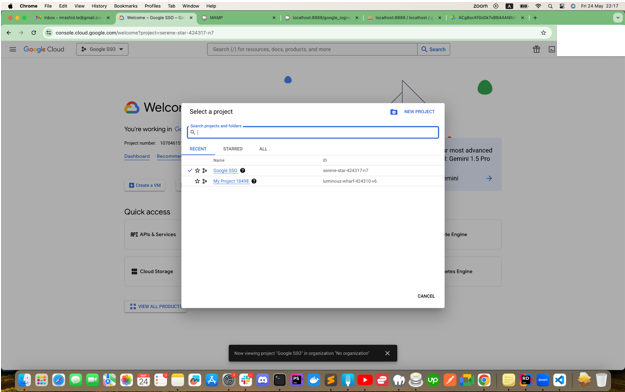
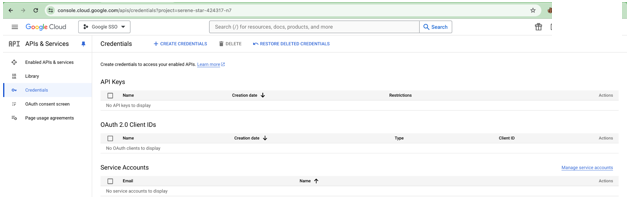
4 – Click on “APIs & Services”:
The following screen appears:
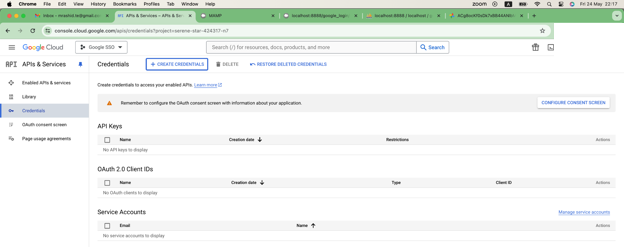
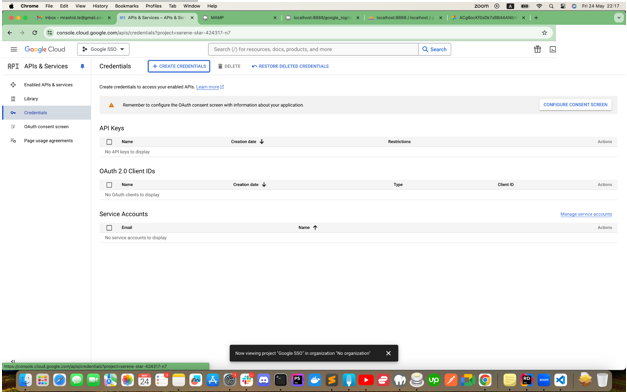
5 – Click on Create Credentials:
Select the “OAuth client ID” from the List. The following screen appears:
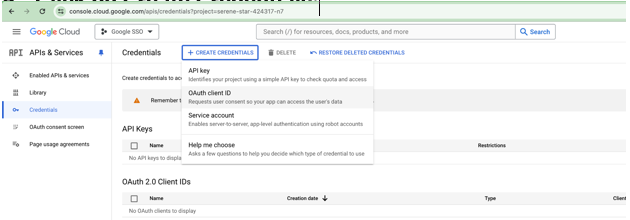
Select the “OAuth client ID” from the List. The following screen appears:
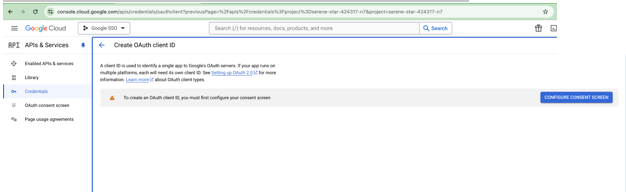
Now click on the “CONFIGURE CONSENT SCREEN”.
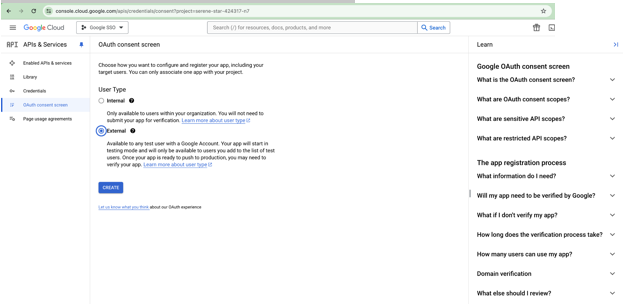
Now Select the option “External” and Click on the “Create” button.
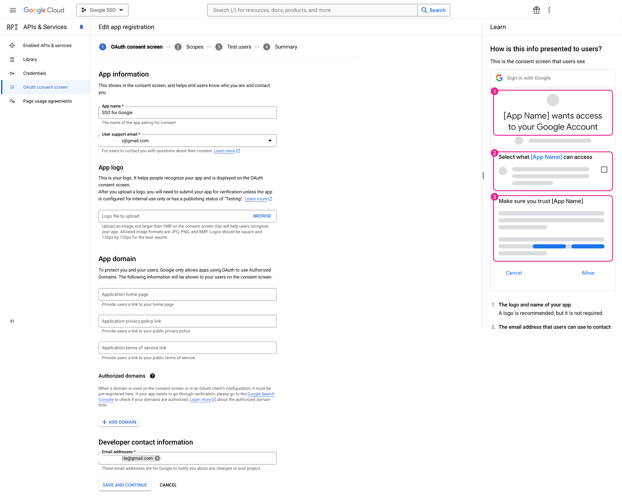
Fill the required fields as shown above and click on the “SAVE AND CONTINUE” button.
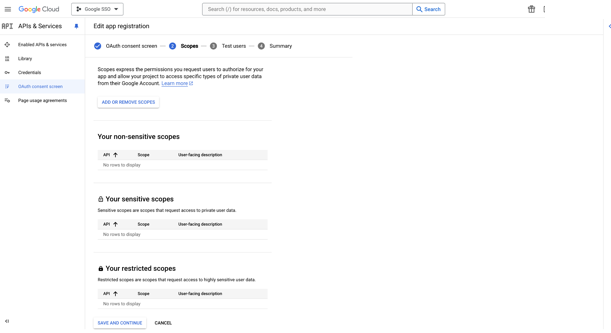
No need to change anything here, just click the button “SAVE AND CONTINUE”
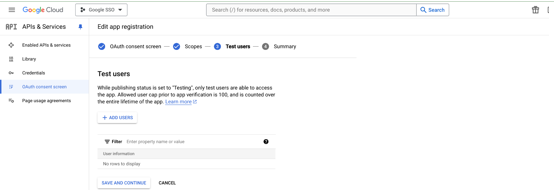
Again Click on button “SAVE AND CONTINUE”
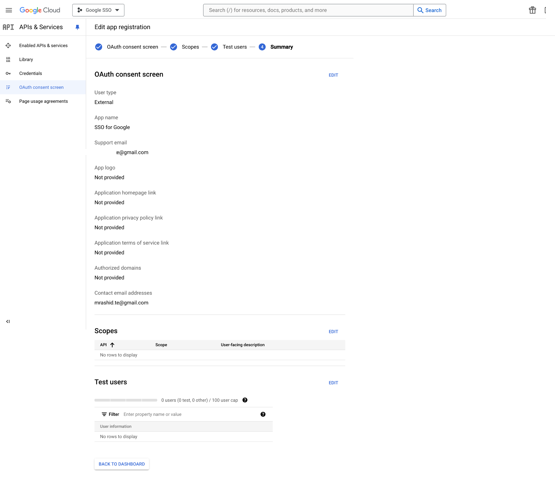
Now click on the “BACK TO DASHBOARD” button. The following screen will appear where we will again click on “CREATE CREDENTIALS” Link.
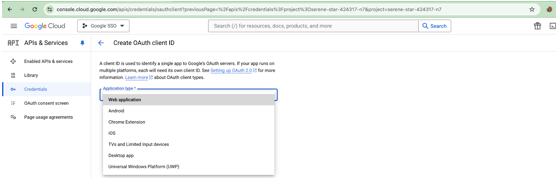
Now select the “Web application” option from the below dropdown:
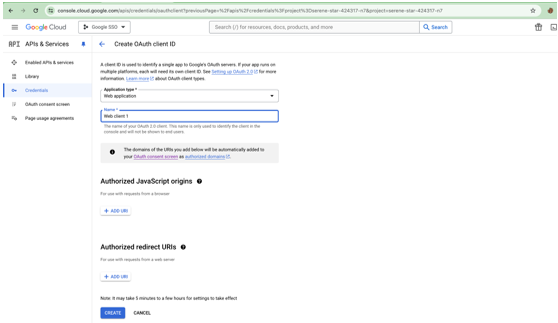
Here we can set the Name for Application in the below form:
This screen will appear once we click on the “CREATE” button in the above screen:
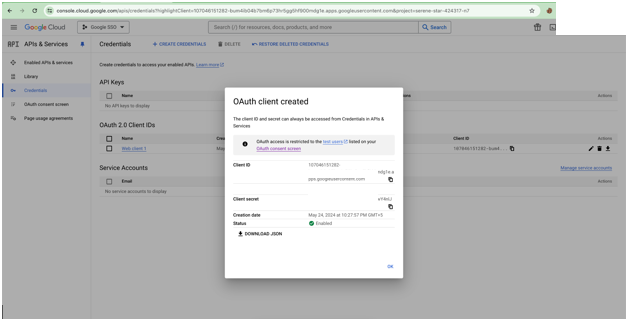
Here we can get the “Client ID” and “Client Secret” to put into the “config.php” file. Now we have to Edit the “OAUTH 2.0 Client IDs”:
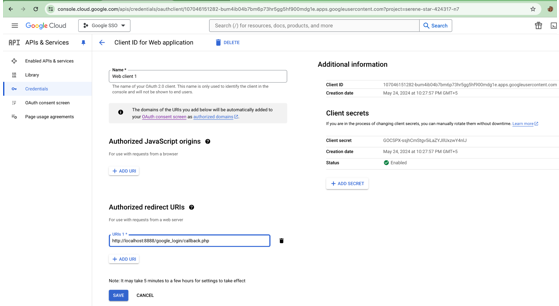
In the above screen You need to add the Redirect URI. In my case the redirect URI is:
http://localhost:8888/google_login/callback.php
Click on the “SAVE” button. And it all sets on the Google Cloud Console.
What to set into the Config.php File:
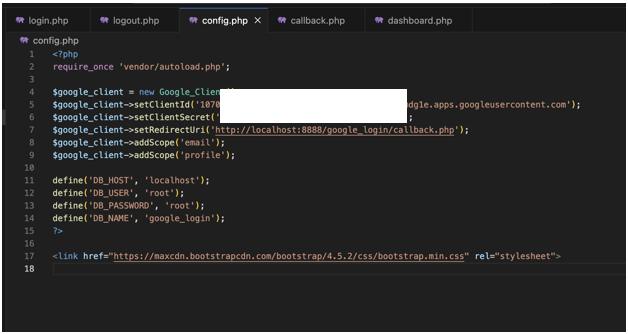
In the above screenshot I have shown the config.php file in which we need to configure the Google Cloud Console Credentials and the database configurations.
Flow of the Application:
1. Login Page (login.php)
The login page handles user authentication through Google OAuth. It initiates the login process and processes the OAuth callback to retrieve user information.
Google_Client Configuration: Sets up the Google API client with the client ID, client secret, and redirect URI.

Key Points in Callback.php
- Database Interaction: Checks if the user exists in the database and updates or inserts their information accordingly.
- Session Management: Stores user information in PHP sessions.
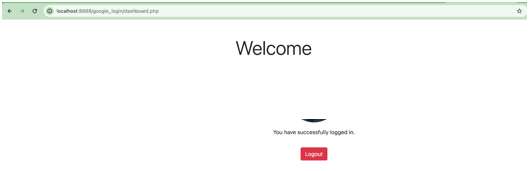
2. Dashboard Page (dashboard.php)
The dashboard page displays a welcome message along with the user’s profile picture. It ensures that only authenticated users can access the page.
- Session Verification: Checks if the user is logged in by verifying the session.
- User Information Display: Displays the user’s name and profile picture.
Logout Link: Provides a link to the logout page.
3. Logout Page (logout.php)
Purpose
The logout page handles user logout by destroying the session and redirecting to the login page.
Key Points
- Session Destruction: Ends the user session.
Redirection: Redirects the user back to the login page after logout.
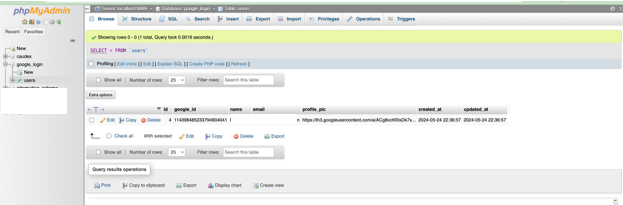
Database Setup
The database named google_login contains a single table users with the following structure:
Configuration
- Database Name: google_login
- Table Name: users
- Fields:
- id: Auto-incremented primary key
- google_id: Google user ID
- name: User’s name
- email: User’s email
- profile_pic: URL of the user’s profile picture
Prerequisites
- Google API Client Library: Install using Composer
- composer require google/apiclient:^2.0
- Google API Credentials: Obtain from Google Developer Console.
- Web Server: Ensure a web server (e.g., Apache, Nginx) is running locally.
Database: Set up a MySQL database with the appropriate schema.
Leave a Reply
You must be logged in to post a comment.


Leave a Comment